项目里需要实现UITableView的Cell的高度自适应,google后发现都是基于默认cell的处理,对于自定义的UITableViewCell没有效果,稍微研究了一下代码,发现,关键还是在计算UILabel的高度上,于是稍微对网上现成的代码做了写修改,实现了需要的功能。
要实现的效果如下:
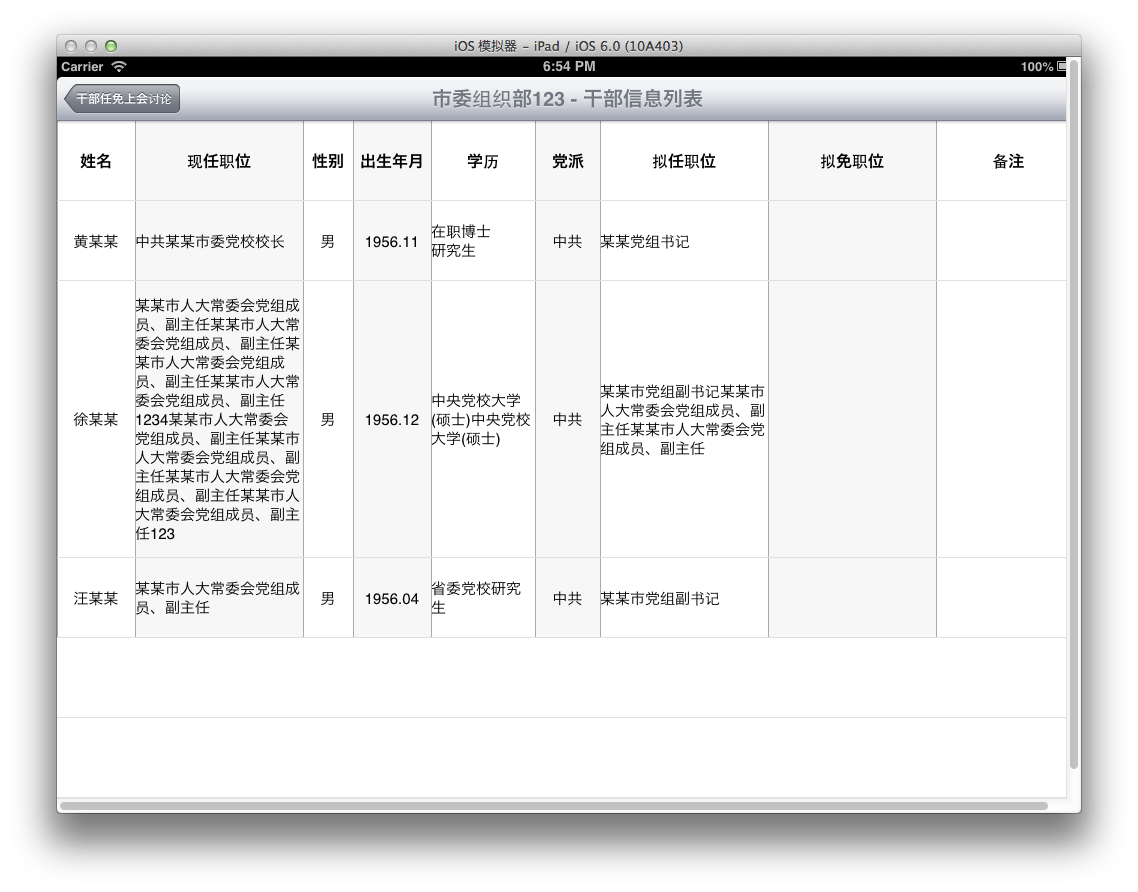
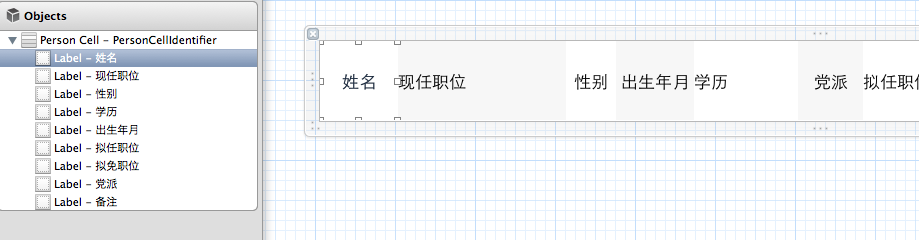
自定义的cell也很简单,一排label,简单的表格效果:
简单贴一下关键代码,做为备忘:
1、设置全局变量来保存每行高度,目的是避免重复计算高度
@property (nonatomic, retain) NSMutableArray *cellHeightList;
@synthesize cellHeightList;


- (void)viewDidLoad
{
    [super viewDidLoad];
    //初始化
    self.cellHeightList = [[NSMutableArray alloc] init];
}
<br/>
2、计算每行cell高度,并保存高度列表
<br/>
- (float)tableView:(UITableView *)tableView heightForRowAtIndexPath:(NSIndexPath *)indexPath
{
    int row = [indexPath row];
    //设置字体信息
    UIFont *textfont15 = [UIFont systemFontOfSize:15];
    //选取几个可能内容比较多的label值
    Category *category = (Category *)[self.personList objectAtIndex:indexPath.section];
    NSDictionary *rowData = [category.list objectAtIndex:row];
    NSString *pnowContent = [rowData objectForKey:@"ppositionnow"];
    NSString *pfurContent = [rowData objectForKey:@"ppositionfur"];
    NSString *pcancelContent = [rowData objectForKey:@"ppositioncancel"];
    NSString *degreeContent = [rowData objectForKey:@"pdegree"];
    NSString *infoContent = [rowData objectForKey:@"potherinfo"];

    // 分别计算显示这些内容的几个label所需要的最小尺寸
    //169.0f;104.0f;145.0f为label的宽度
    CGSize pnowsize = [pnowContent sizeWithFont:textfont15 constrainedToSize:CGSizeMake(168.0f, 1000.0f) lineBreakMode:NSLineBreakByWordWrapping];
    CGSize pfursize = [pfurContent sizeWithFont:textfont15 constrainedToSize:CGSizeMake(168.0f, 1000.0f) lineBreakMode:NSLineBreakByWordWrapping];
    CGSize pcansize = [pcancelContent sizeWithFont:textfont15 constrainedToSize:CGSizeMake(168.0f, 1000.0f) lineBreakMode:NSLineBreakByWordWrapping];
    CGSize degsize = [degreeContent sizeWithFont:textfont15 constrainedToSize:CGSizeMake(104.0f, 1000.0f) lineBreakMode:NSLineBreakByWordWrapping];
    CGSize infosize = [infoContent sizeWithFont:textfont15 constrainedToSize:CGSizeMake(145.0f, 1000.0f) lineBreakMode:NSLineBreakByWordWrapping];

    //保存不同label高度值
    NSMutableArray *heightArray = [[NSMutableArray alloc] initWithCapacity:5];
    [heightArray addObject:[NSNumber numberWithFloat:pnowsize.height]];
    [heightArray addObject:[NSNumber numberWithFloat:pfursize.height]];
    [heightArray addObject:[NSNumber numberWithFloat:pcansize.height]];
    [heightArray addObject:[NSNumber numberWithFloat:degsize.height]];
    [heightArray addObject:[NSNumber numberWithFloat:infosize.height]];
    //初始化最大高度值
    NSNumber *max_height = [NSNumber numberWithInt:50];
    //比较,找出最大高度做为cell的高度
    for (int i=0;i<[heightArray count];i++){
        if ([[heightArray objectAtIndex:i] intValue]>[max_height intValue]) {
            max_height = [heightArray objectAtIndex:i];
        }
    }

    //保存cell高度到全局变量
    [self.cellHeightList addObject:[NSNumber numberWithFloat:[max_height floatValue]+30]];

    return [max_height floatValue]+30.0;

}
<br/>
3、设置cell内UILabel的高度
<br/>
- (UITableViewCell *)tableView:(UITableView *)tableView cellForRowAtIndexPath:(NSIndexPath *)indexPath
{
    ……

    NSDictionary *rowData = [category.list objectAtIndex:nowrow];
    NSString *pnameContent = [rowData objectForKey:@"pname"];
    NSString *pnowContent = [rowData objectForKey:@"ppositionnow"];
    NSString *pfurContent = [rowData objectForKey:@"ppositionfur"];
    NSString *pcancelContent = [rowData objectForKey:@"ppositioncancel"];
    NSString *genderContent = [rowData objectForKey:@"pgender"];
    NSString *degreeContent = [rowData objectForKey:@"pdegree"];
    NSString *birthContent = [rowData objectForKey:@"pbirth"];
    NSString *partyContent = [rowData objectForKey:@"pparty"];
    NSString *infoContent = [rowData objectForKey:@"potherinfo"];
    //获取当前cell高度
    float labelHeight = [[self.cellHeightList objectAtIndex:nowrow] floatValue];
    //当前label信息
    CGRect pnameFrame = cell.PersonNameLabel.frame;
    CGRect pnowFrame = cell.PositionNowLabel.frame;
    CGRect pfurFrame = cell.PositionFurLabel.frame;
    CGRect pcanFrame = cell.PositionCancelLabel.frame;
    CGRect genderFrame = cell.GenderLabel.frame;
    CGRect degreeFrame = cell.DegreeLabel.frame;
    CGRect birthFrame = cell.BirthLabel.frame;
    CGRect partyFrame = cell.PartyLabel.frame;
    CGRect otherFrame = cell.OtherLabel.frame;
    //修改label的高度
    pnameFrame.size.height = labelHeight;
    pnowFrame.size.height = labelHeight;
    pfurFrame.size.height = labelHeight;
    pcanFrame.size.height = labelHeight;
    genderFrame.size.height = labelHeight;
    degreeFrame.size.height = labelHeight;
    birthFrame.size.height = labelHeight;
    partyFrame.size.height = labelHeight;
    otherFrame.size.height = labelHeight;
    //更新label的信息
    cell.PersonNameLabel.frame = pnameFrame;
    cell.PositionNowLabel.frame = pnowFrame;
    cell.PositionFurLabel.frame = pfurFrame;
    cell.PositionCancelLabel.frame = pcanFrame;
    cell.GenderLabel.frame = genderFrame;
    cell.DegreeLabel.frame = degreeFrame;
    cell.BirthLabel.frame = birthFrame;
    cell.PartyLabel.frame = partyFrame;
    cell.OtherLabel.frame = otherFrame;
    //设置label内容
    cell.PersonNameLabel.text = pnameContent;
    cell.PositionNowLabel.text = pnowContent;
    cell.PositionFurLabel.text = pfurContent;
    cell.PositionCancelLabel.text = pcancelContent;
    cell.GenderLabel.text = genderContent;
    cell.DegreeLabel.text = degreeContent;
    cell.BirthLabel.text = birthContent;
    cell.PartyLabel.text = partyContent;
    cell.OtherLabel.text = infoContent;

    ……
}
<br/>
编译运行,搞定……

